Before I launch into describing the interlocking, I need to just go over a few signalling basics, mainly the types of signals, routes and aspects.
I won’t cover everything in the signalling world, just the saliant points from an interlocking point of view that you will need to understand in the next few posts. If you want a fuller explanation of colour light signalling principles, see my book.
Control of Signs
· ‘Controlled’ / ‘Route Setting’ – A signal whereby its operation is controlled by a signaller operating the panel, it will have one or more interlocked routes from it. This can be a ‘Main’ or ‘Position Light’ Signal and may have an ‘Automatic Working Facility’ provided
· ‘Automatic’ / ‘Non-Route Setting’ – A signal that is controlled automatically by the passage of trains, the only control afforded to the signaller being an emergency ‘replacement’ button (prior to 1990, not all signals required a signallers replacement facility’). This type of signal can only be used where the route does not contain moveable infrastructure or opposing routes. These are ‘Main’ signals only. These signals can be included in the interlocking or controlled by ‘local’ lineside circuitry
· ‘Semi-Automatic’ – A signal that is generally works in the same way as a ‘Automatic’ Signal but could be controlled by a ground frame. Note: Banned for new works since ~1990
· ‘Dis-engageable Automatic’ – An ‘Automatic’ Signal that can be stopped from working Automatically if required for the protection of a User Worked Crossing. Note: Introduced in 2016, replaced in December 2021 by ‘Controlled Intermediate Signal’
· ‘Non-Approachable Red’ – A ‘Distant’ Signal that shows a red aspect when no route is set towards it. Intended to prevent read across issues in certain circumstances in Simplified Bi-Directional Signalling. Formally introduced in December 2021, but have been installed from 2018
· ‘Controlled Intermediate’ – A ‘Controlled’ Signal that has only a single route with no moveable infrastructure or opposing routes within it. Always provided with an ‘Automatic Working Facility’. Introduced in December 2021 and replaces the concept of ‘Automatic’ Signals in new works
It should be noted that on Collingwood, I only use the ‘Controlled’ and ‘Controlled Intermediate’ Types of Signal.
Routes
A ‘route’ in signalling doesn’t mean the same as in the ‘normal’ world. A signalling route is made up of the not only the physical path of the train, but also a type of route. There are five types or ‘classes’ of route:
| Panel Symbol | Name | Description |
|---|---|---|
 | ‘Main’ Route | Route from one main signal to the next that allows running movements. It requires the section and overlap to be clear. |
 | ‘Warner Route’ | Route from one main signal to another using a restricted overlap and where the ‘exit’ signal is at red. |
 | ‘Call-On’ Route | A route that is provided to permit a train movement into a section known to be occupied. |
| ‘Shunt’ Route | A route used for low-speed non-passenger movements. |
 | ‘POSA’ Route | A route for use during lineside signalling failures to instruct the driver to enter a Signal Section and proceed at such a speed that the train can be stopped short of any obstruction. |
It should be pointed out that there are currently two types of shunt route. One is ‘Shunt Occupied’ (SO) and other is ‘Shunt Unrestricted’ (SU). These terms define whether only some of the train detection within the route are proved to be clear or all of them and have replaced the terms ‘Permissive’ & ‘Non-Permissive’ respectively.
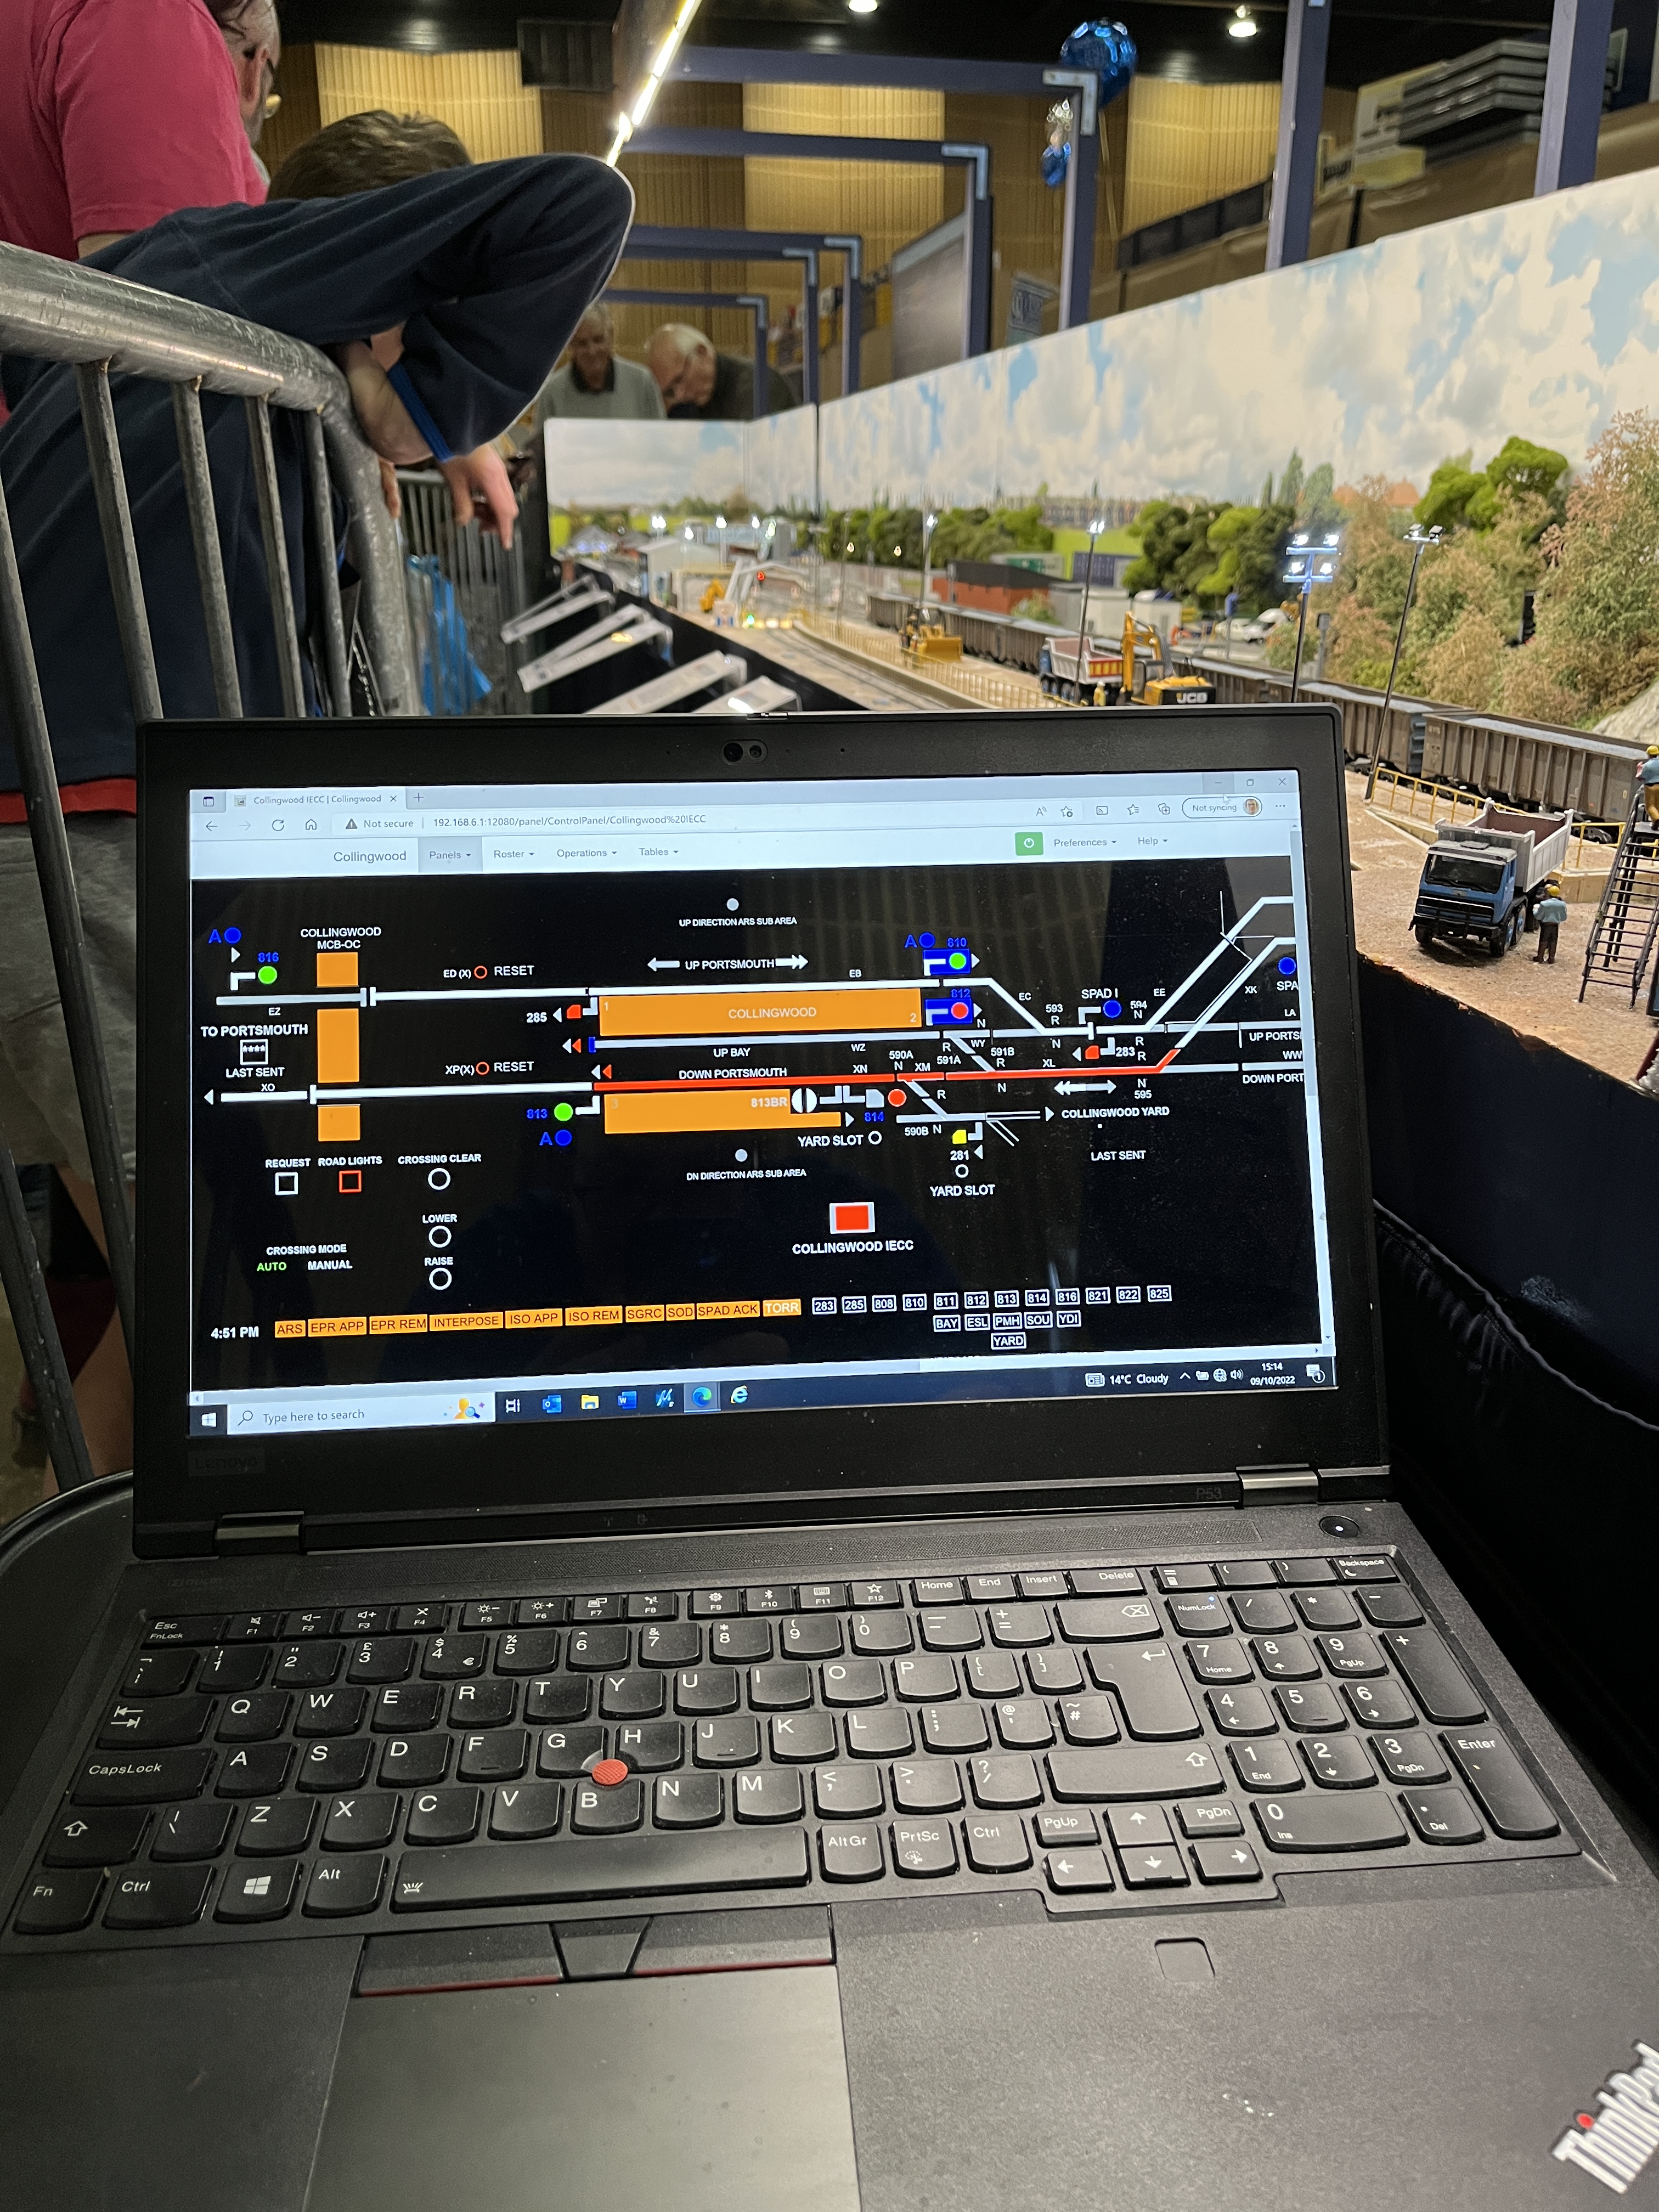
***It should be noted that for ‘real-life’ VSCS Workstations, the entrance button and main exit button shown on Collingwoods VSCS do not exist, the signaller simply clicking on the signal post performs the same action. This is due to a limitation with JMRI***
Collingwood has 4 out of the 5 classes of route, most of its routes are ‘Main’ Class routes, highlighted here. There is a single ‘Warner’ Route from CD816 up to CD810 to allow a train to arrive from Portsmouth into Platform 1 whilst a train is departing from the bay. Call-On Routes are provided from CD811 & CD821 into Platform 3 and into the Bay, to allow me to join trains together & for platform sharing. Shunt routes are provided, one in & one out of the yard and a couple to allow you to shunt train between Platforms 1 and 2. See the video below for examples of each route being set:
Aspects
I think we are all probably quite familiar with the aspects that a signal can show:
| Aspect | Name | Description |
|---|---|---|
 | ‘Danger’ / ‘Red’ | A train can not pass this signal without authority from the signaller |
 | ‘Caution’ / ‘Single Yellow’ | Signal ahead shows ‘Danger’, reduce speed of train to stop at next signal |
 | ‘Preliminary Caution’ / ‘Double Yellow’ | Signal ahead shows ‘Caution’, reduce speed of train to stop at signal ahead of next signal Only used in 4-Aspect Areas |
 | ‘Proceed’ / ‘Green’ | Signal ahead shows ‘Proceed’ or ‘Preliminary Caution’ / ‘Caution’, train can continue at Linespeed |
 | ‘Position Light’ | Train may pass signal at danger, proceed on sight and at speed that you can stop within sighting distance, be prepared to stop short of an obstruction |
You may also be aware of other aspects that can be displayed:
| Aspect | ||
|---|---|---|
 or 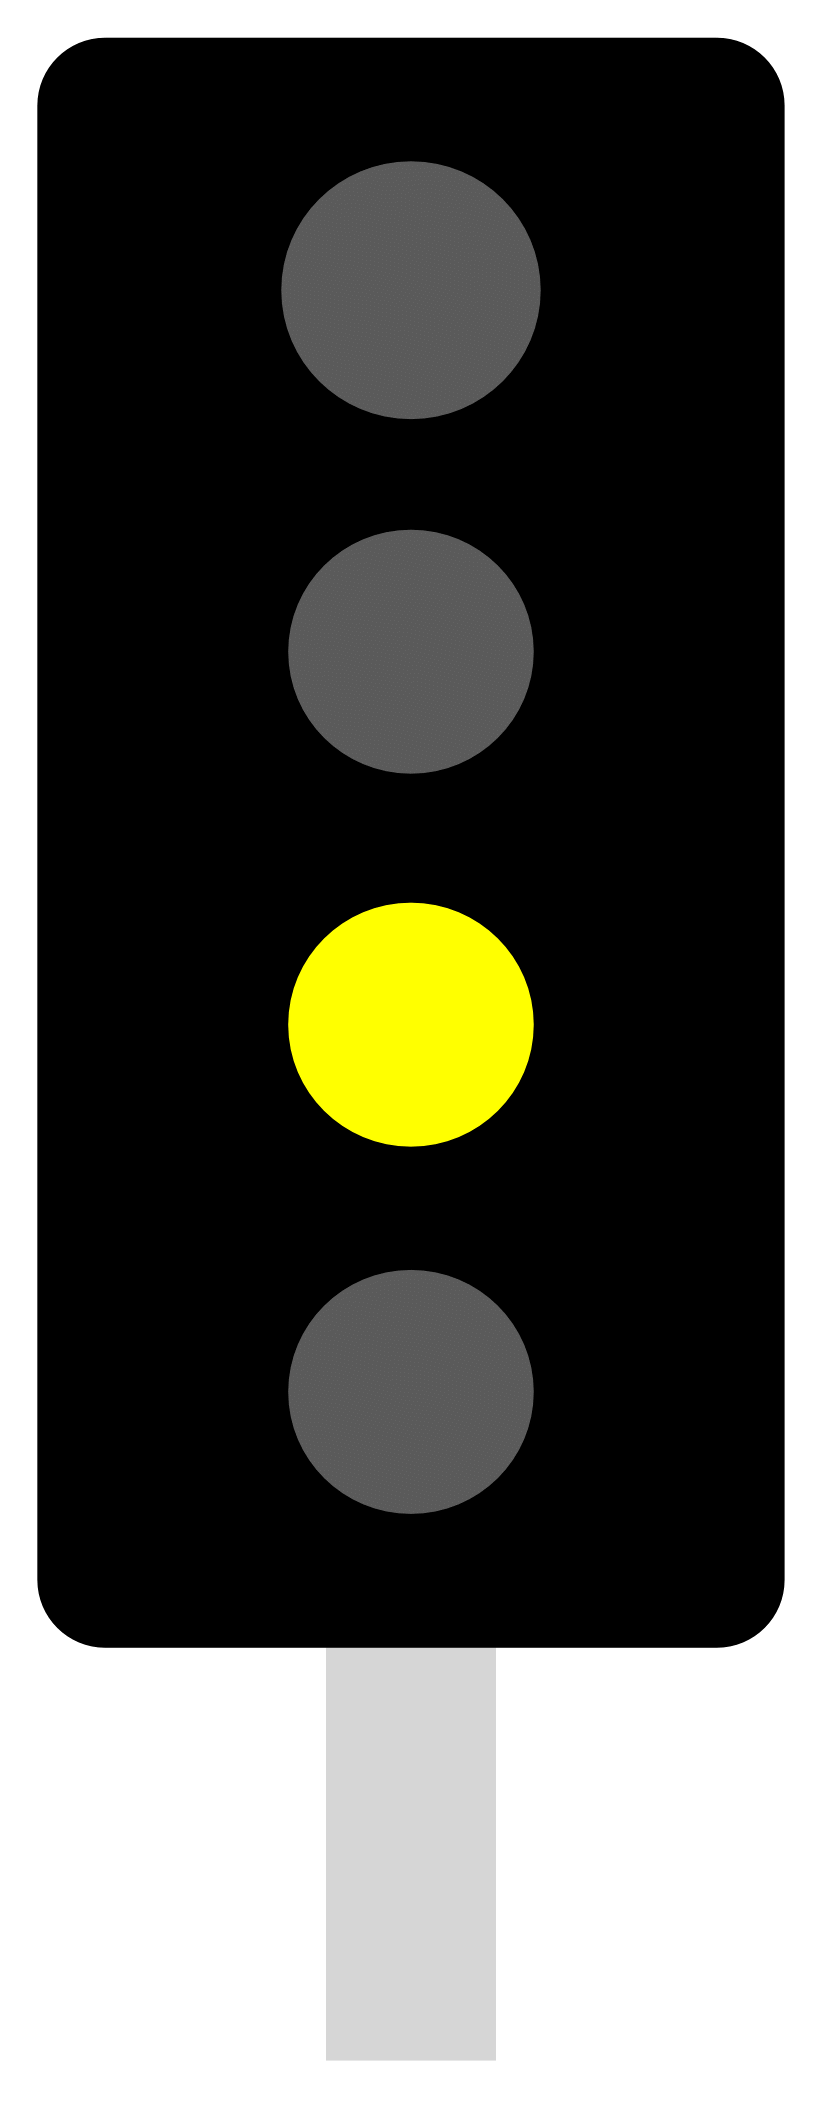 | ‘Flashing Caution’ / ‘Flashing Single Yellow’ | Junction protecting signal ahead shows divergent route, reduce train speed to junction speed. Used with ‘Flashing Aspects’ Junction Control |
 or 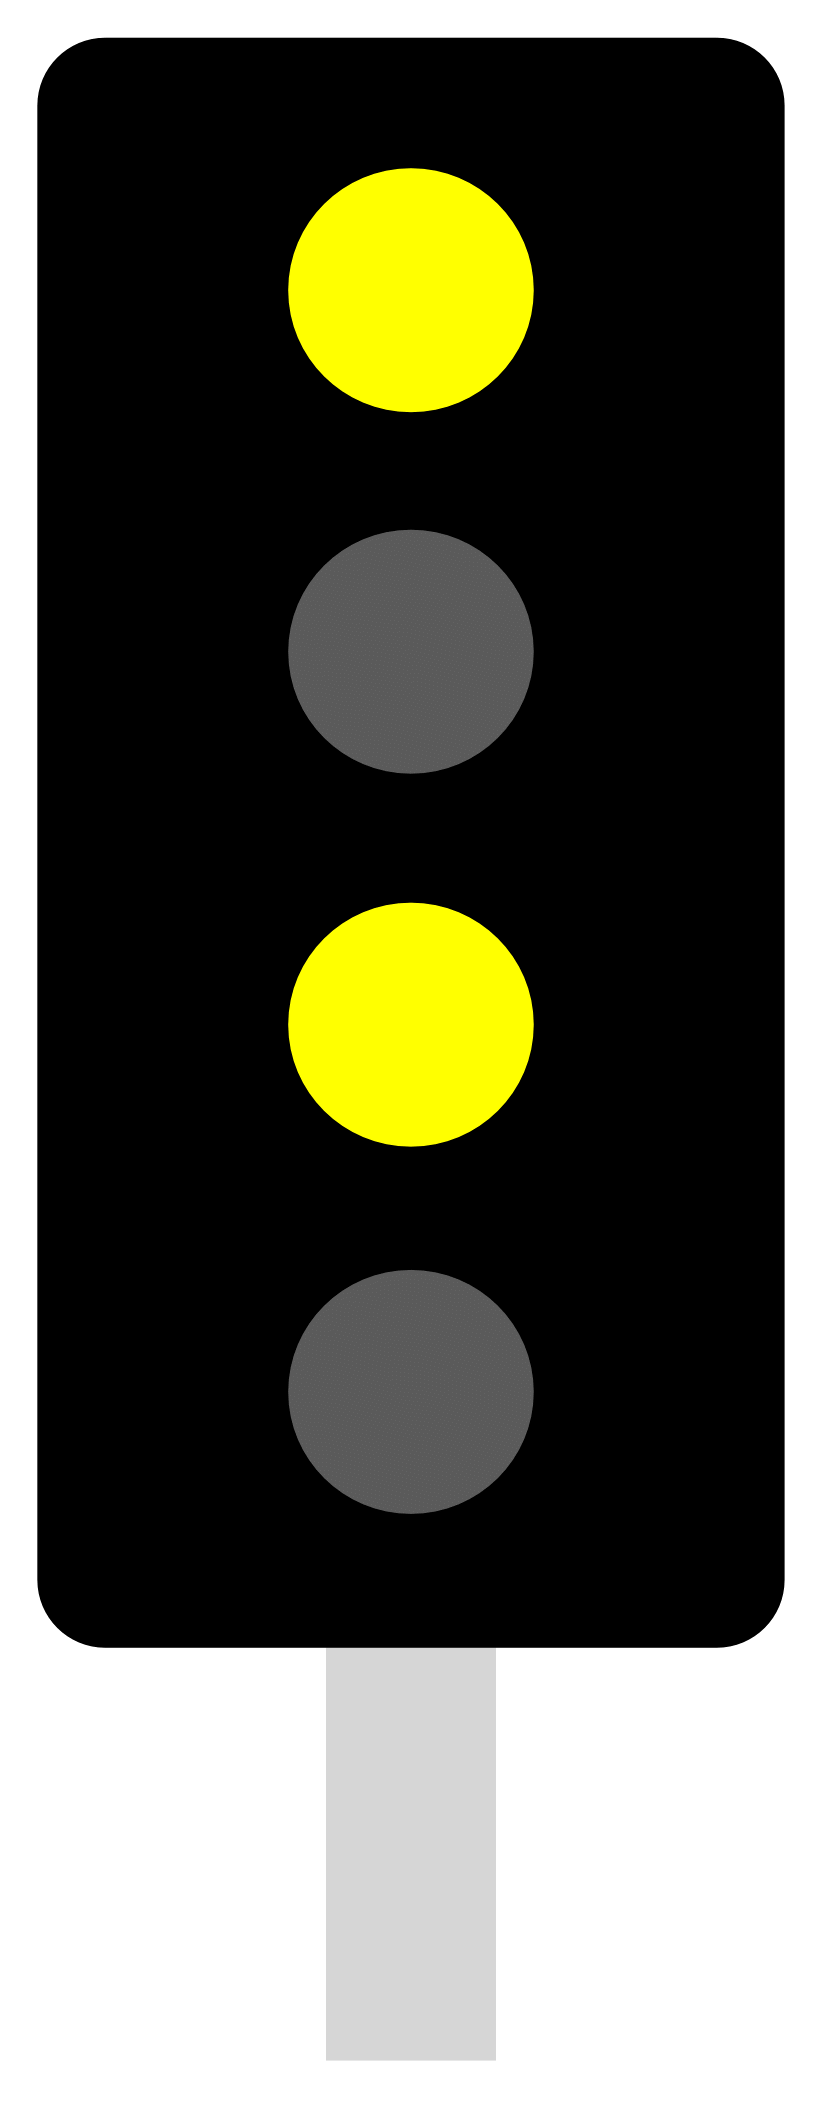 | ‘Flashing Caution’ / ‘Flashing Single Yellow’ | Junction protecting signal ahead shows divergent route, reduce train speed to junction speed. Used with ‘Flashing Aspects’ Junction Control Used in 4-Aspect Areas |
 | ‘Proceed on Sight Authority’ | Route Ahead contains a train detection failure, train may pass signal at danger, proceed on sight and at speed that you can stop within sighting distance, be prepared to stop short of an obstruction Only used for a ‘PoSA’ route |
 or  | ‘Flashing Proceed’ / ‘Flashing Green’ | Authority for Class 91 Test Trains ONLY to travel above linespeed up to 140mph |
 | ‘Signal Passed at Danger’ Indicator | Any train observing this aspect must be brought to a stand immediately Banned for new works after 2001 |
On Collingwood, I have no need for the flashing aspects, except for the SPAD indicator.
An interesting note for modellers is that for flashing aspects, the ‘flashing style’ is different depending on what type of signal head is provided. For the older ‘Filament’ Style SL-35 heads, the aspect actually only dims rather than fully goes out, this was to preserve the life of the filaments as they won’t experience repeated high start up currents that would be present if they went fully out. Whereas, with a modern LED head, this issue is not great, so they now go fully out. So, it is an interesting difference that you could model (although you would need a micro-controller to control the dimming). (Although it is worth noting that PoSAs have always been introduced as part of wider re-signalling, so ‘filament’ versions don’t exist)
Now that I have the basics, out of the way, I can go on to discuss the interlocking.

Great analysis!
LikeLike
Thanks Ivan!
LikeLike
Thanks sir
LikeLike